Tuesday, January 10, 2017

Cheeseburger Soup

It snowed here last weekend. When it snows, we like to think of all the things we can cook while stuck inside. I baked two kinds of cookies, a pot of navy beans with skillet cornbread, and on day 3 of being inside, a pot of cheeseburger soup.
This soup is so simple and quick to make. It's full of veggies and flavor. And if you like bacon on your cheeseburgers, then fry some up and crumble on top so you have bacon cheeseburger soup.  I whipped up some gluten free cheddar garlic biscuits to serve with the soup. It was the perfect combo.

Cheeseburger Soup

1 1/2 pounds hamburger, browned and drained
1 cup diced onion
1 cup diced carrots
1/2 cup diced celery
2 Tbsp butter
6 small-medium potatoes, peeled and diced
4 cups chicken broth (beef will work too)
1 tsp Worcestershire sauce
1/2 tsp seasoned salt
1 tsp black pepper
1 cup milk
1/2 cup heavy cream
2 cups grated sharp cheddar cheese, plus more for serving

In Dutch oven brown hamburger. Drain, and set aside. 
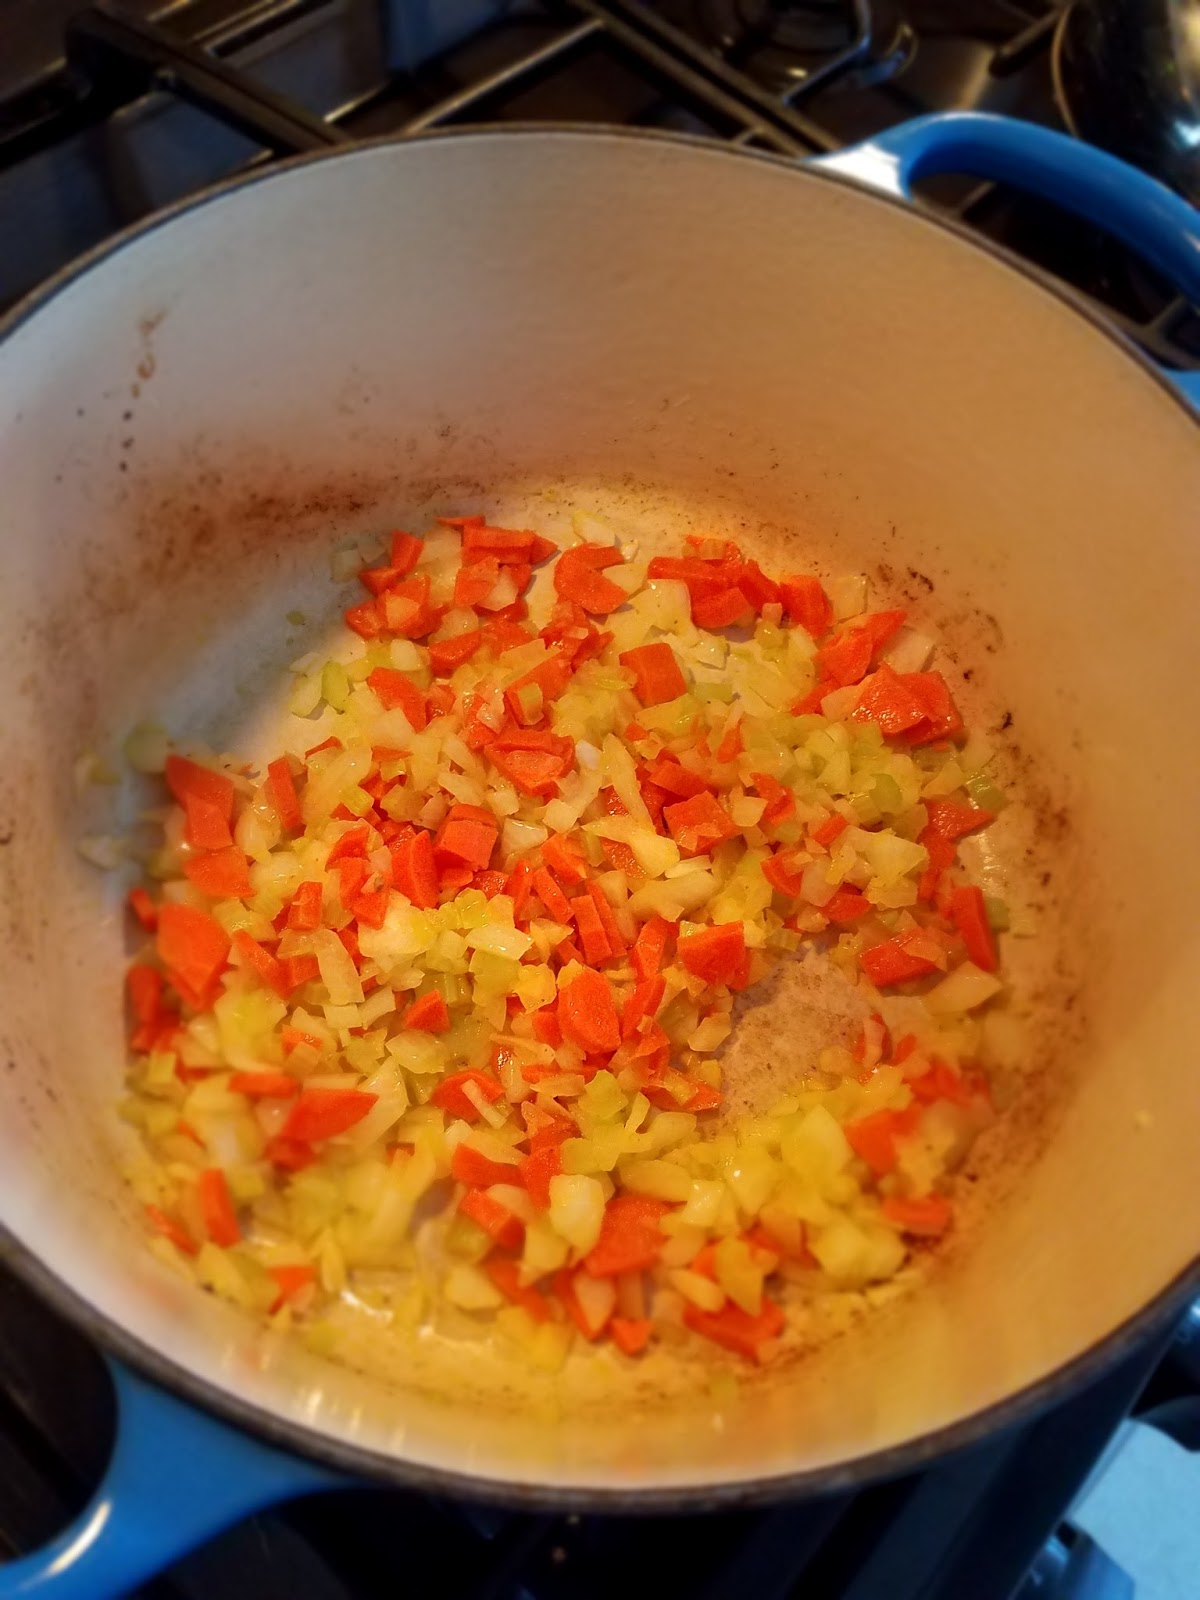
Add the butter to the Dutch oven and melt over medium heat, add in all the veggies and saute until tender. 
Add the broth, then the potatoes. Add in the Worcestershire, salt, and pepper. Add the hamburger back in and let simmer on medium-low until the potatoes are tender, 20 minutes or so. When the potatoes are tender, add in the milk and cream. Simmer a few more minutes then add in the 2 cups of cheddar. Let the cheese melt, taste and adjust salt and pepper as needed. Serve it up and add more cheese on top of individual servings if preferred. 


Wednesday, November 9, 2016

Mirepoix Rice, a Review, and My love of the IP

Several months ago I asked, OK I begged, for one of those fancy schmancy electric pressure cookers. A 7 in 1 electric pressure cooker. An Instant Pot.  My friend had recently gotten one and shared with me all the wonderful things she was cooking.  Admittedly,  I'm a sucker for kitchen gadgets and I just HAD to have one of these pots.
I have a stove top pressure cooker and I can't really say I didn't use it much for fear of blowing up the house. My mama used one often when I was growing up and I always felt safe, but I do know that you don't venture far away from them when in use. 
So, enter the Instant Pot (and I am not affiliated with the company at all, just sharing the one that I love to use).  I use this pot almost every day of the week. It is simple to use and easy to clean up. I'm also comfortable with leaving it on while I run out to feed the chickens and pigs. 😊


One of my favorite foods to cook in the IP is rice. We have rice at least once a week because of how good it tastes and cooks in the pressure cooker.
I really like rice from Palmetto Farms. The flavor is sweet and nutty. Of course rice is so versatile also.  Oh and their grits are the best!

I made a mirepoix rice dish in the electric instant pot that was delicious. Mirepoix is a combination of rough chopped onion, carrots, and celery. This rice was filling and comforting. You can always add in chicken, pork, or shrimp to make it a complete meal. My daughter said it reminded her of chicken and rice soup even without the chicken.
I'm sharing my recipe for the rice cooked in the pressure cooker, but you could certainly adapt it for cooking on the stove top or even baked in the oven.

Pressure Cooker Mirepoix Rice

2 Tbsp butter or oil, plus 2 more Tbsp butter (added at end)
1/2 small sweet onion, rough chopped
2 medium carrots, rough chopped
2 stalks of celery, rough chopped
2 cups rice
2 1/2 cups chicken broth
1 tsp black pepper
1/2 tsp salt

Heat the pressure cooker using the Saute function. Add the butter. Once melted, add in the onion, carrots, and celery. Cook for 3-5 minutes, stirring constantly. 
Turn pressure cooker off when veggies are just about tender. 
Next, add to the pressure cooker pot the rice, chicken broth, salt, and pepper. Give it a stir. Lock the lid and cook on Manual, High Pressure for 3 minutes. Once the pressure cooker is done and beeps, allow it to naturally release for 7 minutes. Open the lid, add in 2 Tbsp butter, stir and enjoy! 


Wednesday, October 21, 2015

Book Review and Grain Free Pumpkin Roll

We are full swing into pumpkin season. Pumpkin drinks (PSL), pumpkin doughnuts, pumpkin pie. You name it and someone will turn a recipe into a pumpkin treat.  For several weeks, I've had the privilege of reviewing the wonderful cookbook, Without Grain by Hayley Ryczek. In her book,  Hayley has done a great job of explaining what a grain free lifestyle looks like.  The how-to's, the why's, and awesome recipes--it is all in her new cook book. She includes 100 recipes that are grain free, gluten free, and wheat free. The information Hayley provides helps anyone understand this lifestyle better.
Some of my favorite recipes from Without Grain are the bagels, waffles, and crispy baked pork chops. My kids loved the pork chops! Everything I've made has been full of flavor and very satisfying. 
You can learn more about Hayley and find mouth watering recipes on her website, Health Starts in the Kitchen. And.....she's been so nice to allow me to share with you her recipe for Pumpkin Roll with Cream Cheese Filling! 
If you have ever looked at those plump, oozing with yummy filling pumpkin rolls in the store then you know they are probably filled with ingredients that you don't really want to eat. They also look a little intimidating to make.  But this pumpkin roll recipe has delicious ingredients--that you can pronounce-- like coconut sugar, almond flour, and maple syrup. And best of all, other than tasting amazing, is how easy it is to make. So I do hope you try this recipe and let me know when you do!

Pumpkin Roll with Cream Cheese Filling

For Cake:
1/4 cup blanched almond flour
1/4 cup tapioca starch
1/4 cup arrowroot starch
1/2 teaspoon baking soda
1/2 teaspoon baking powder
1/2 teaspoon ground cinnamon
1/2 teaspoon ground cloves
1/4 teaspoon sea salt
3 large eggs
1 cup coconut sugar
2/3 cup pumpkin puree
Optional: 1 cup chopped nuts, such as walnuts or pecans
Powdered sugar, for dusting

For Filling:
8 ounces cream cheese, softened
1/2 cup butter, softened
2 tablespoons honey
2 tablespoons maple syrup
1 teaspoon vanilla extract

1. Preheat the oven to 375° or gas mark 5.  Line a 15x10 inch jelly-roll pan with lightly greased parchment paper.

2. To make the cake: In a medium bowl, combine the flour, starches, baking soda, baking powder, cinnamon, cloves, and salt and mix well.

3. In a large bowl with a handheld mixer or in the bowl of a stand mixer on medium speed, beat together the eggs and coconut sugar until thick.  Add the pumpkin puree and blend until combined.  Gradually add the dry ingredients and mix until smooth.

4. Pour the batter onto the prepared jelly-roll pan and sprinkle with the chopped nuts, if desired.  Bake for 10-15 minutes until the top of the cake springs back when touched.

5. While the cake is baking, spread out a clean kitchen towel and sprinkle with powdered sugar.  When the cake is done, remove it from the oven and gently flip the cake onto the powdered sugared towel, so the parchment paper is on top, and peel off the paper.

6. Staring at the short end, roll up the towel and cake together into a jelly roll.  Set seam-side down and allow to completely cool while rolled up, about 1 hour.

7. To make the filling: In a bowl with a handheld mixer or in the bowl of a stand mixer on medium speed, beat together the cream cheese and butter until fluffy, about 2 to 3 minutes.  Add the honey, maple syrup, and vanilla and beat until smooth.

8. When the cake is completely cool, gently unroll it and spread with the cream cheese filling to the edges.  Roll it back up (without the towel) and wrap in plastic wrap.  Chill in the fridge for at least 1 hour before cutting and serving.  Dust with powdered sugar, if desired.

NOTE:  Pumpkin rolls freeze well, wrapped tightly in plastic wrap, for up to 6 months.  (Freeze it in slices so you can take out just what you need.) Allow to thaw overnight in the fridge before serving.


Saturday, May 23, 2015

Easy Italian Cucumber Salad

I just whipped up this salad for a picnic tomorrow. It was very quick and easy. There aren't many ingredients and most you probably have on hand.
It is the season for picnics and cookouts and easy recipes are always winners!

Easy Cucumber Salad

2-3 Cucumbers
3 Roma tomatoes
1/2 small red onion
Bottled Italian salad dressing
Fresh purple basil
Cracked black pepper
Mozzarella Cheese, fresh

Wash the veggies. Slice Cucumbers into thick rounds then quarter the rounds. Dice tomatoes. Combine those in a large bowl. Dice onion and add to bowl. Crack some black pepper over veggies.  Snip some fresh purple basil in there. As much as you like. Stir all that together then pour about half a bottle of Italian dressing over veggies and stir. You may want more dressing, but this amount looked like enough for me. Cover and chill for several hours before serving. Just before serving, stir in some fresh mozzarella cheese.

That's it! What are some of your favorite cookout sides?

Happy picnicking!

Thursday, May 7, 2015

Clean, Healthy Snacks

Well it's that time of year again. Summer is sneaking up on us. Yay!! It truly is my favorite time of year. I'm definitely a warm weather girl.
I'm going to share with you a few of my favorite snacks for those warm weather days of summer. (Really, these snacks are great all year round.)
These are easy, healthy snacks that are also clean and natural.

Frozen Grapes
These are such a refreshing treat on a hot day!  Just wash red or green seedless grapes, dry well, place in a plastic bag, and then place the bag flat in the freezer. Keep the bag flat so the grapes are in a single layer. Freeze for a few hours until they are solid. Keep in the freezer for a quick snack. 

Clementines/Mandarins and Nuts 
 These little orange babies are so good and sweet. Nature's candy! Pair these with almonds or pistachios and you've got a great snack.

Celery/Apple with Nut Butter 
Nothing fancy here, just raw celery or a sliced apple with a natural, no sugar added nut butter of your choice. I made almond butter in my Vitamix with just roasted almonds and a tiny bit of sea salt. If you need to sweeten it, mix in a little raw honey.

Frozen Yogurt Drops 

These are very easy to make with plain Greek yogurt and a little honey. Pipe drops, freeze, and enjoy.
 Start with about one cup, or one seven ounce container of nonfat or low fat plain Greek yogurt. Choose wisely and use plain as it doesn't have added sugar. Mix in one tablespoon of raw honey. Put that mixture into a piping bag or a plastic zipper bag with a corner snipped off. Pipe onto a lined cookie sheet. Just pipe small, bite size drops. Freeze until firm, a few hours. Transfer to a container and keep in the freezer. 

Have fun making your healthy snacks and share some of your ideas! 
Happy snacking!


Monday, May 4, 2015

Smoked Paprika and Rosemary Roasted Chicken

We eat a lot of chicken around here. It's good stuff. Don't ya think? Problem is....sometimes I get into a cooking rut. Yea, you too? Thought so. I feel like sometimes I've been cooking the same thing over and over again. Or, it's chicken night. ...what can I do differently to keep smiles all around my kitchen table?

And speaking of the kitchen table--- my awesome husband built ours from wood taken off his family's farm. The boards were used in hog killings back in the day.  Still has the knife marks. (If that makes you queasy,  just stop for a minute, close your eyes, and think of just how good bacon tastes.) It is actually a pretty cool table with rich history. And we get to sit around it every day.  3 times a day!  (Or more) Y'all sit and eat with your family around the kitchen (or dining room, or breakfast nook, or patio) table. Make memories, TALK to one another, pray together.

Ok...I guess you might want to know about this chicken. That is, if you're still reading.

Well, I have this delicious smoked paprika.  I also have fresh rosemary in my herb garden. And a freezer full of chicken thighs. We love chicken thighs...tender and full of flavor. Roasting on high heat does not take long, so that's also a plus for this recipe. Another plus is that I used Kerrygold butter.  Enough said, right?

So basically, melt butter, pour over chicken, season only one side, and roast. Done. And delicious.

Smoked Paprika and Rosemary Roasted Chicken

8-10 boneless skinless chicken thighs
4 tablespoons butter (I prefer Kerrygold)
Sea salt & black pepper
1-2 teaspoons smoked paprika
Fresh rosemary

Preheat oven to 400°
Pat dry your chicken and place on a baking pan with sides. I  use a shallow stone. Melt the butter. Pour butter over chicken then season with sea salt and pepper. Adjust the salt to your personal preference and needs. Next, sprinkle or rub the smoked paprika on your chicken thighs. Begin with 1 tsp and add more as you like. I like a good amount. Snip fresh sprigs of rosemary all over the chicken.
Place in oven and roast until done...30-45 minutes or until chicken is 180° internally. No need to turn the chicken while it is cooking.

*Note* Regular paprika will not have the same flavor as the smoked, so I would not substitute it.

Monday, April 27, 2015

Slow Cooker Salsa Chicken

I love spending time in my kitchen cooking. I love feeding people. But some days I really just want something quick, easy, delicious, and all natural.  I found a similar recipe for salsa chicken online but it was a little too plain for me. I decided to jazz it up a bit with extra seasoning and fancy salsa.

Ingredients
2 boneless skinless chicken breaststroke
1 cup of all natural pineapple or peach salsa
1 cup of corn, frozen
1 teaspoon chili powder

Spray slow cooker pot with non stick spray. Place chicken in then the other ingredients.  Cover and cook on low for 4-6 hours or until chicken is done.
When done, shred chicken with two forks and give it all a good stir. 

Serve over brown rice, tortilla chips, a bed of lettuce, or in a soft tortilla.  Top with grated cheese and fresh cilantro. 

Monday, February 2, 2015

Gingersnaps-- Gluten Free

Ginger, molasses, cinnamon.... those are the tastes and smells of fall, right? Well not necessarily. Many people associate those with fall, yes. In my house, we love them all year round. So I'll be happy to make ginger cookies or molasses cookies or gingerbread muffins (you get the picture) any time! A couple months ago my online friend, Kate posted these spicy gingersnaps recipe.  They looked so good! And they were gluten free. Score! And in that same weekend, my husband and I found a very similar prepackaged gluten free gingersnap with candied ginger in them. Oh those were so good too. I knew I wanted to make a gingersnap...with the candied ginger.  It just took me two months to get around to it.
A peek at the ingredients. That's almond flour back there.

Candied ginger or Crystallized ginger---your choice
G
I used a small scoop because these cookies do spread quite a bit.

I basically used Kate's recipe as a foundation and then tweaked it to suit our taste buds.  I used one teaspoon of sea salt, but I've written the recipe for a half of teaspoon because I thought one was a little too much after tasting.  I use a little fresh grated ginger and I really believe that makes a difference too. 


Gingersnaps-- Gluten Free

1/2 cup unsalted butter, softened (I use Kerrygold)
1 cup coconut sugar
1 egg
1/3 cup molasses
2 cups almond flour (I prefer Honeyville)
1/4 cup arrowroot powder (Bob's Red Mill)
1 tsp baking soda (Bob's Red Mill)
1/2 tsp sea salt
1 Tablespoon ground ginger
1 1/2 teaspoons cinnamon
1-2 tsp fresh grated ginger
1 Tablespoon chopped candied ginger

In a stand mixer, mix the butter and sugar until creamy.   Add the egg and molasses and mix until combined well.   

In a separate bowl, whisk together the almond flour, arrowroot powder, baking soda, salt, ground ginger, and cinnamon.  

Add the flour mixture to the mixer and mix well. Once combined, stir in (by hand) the fresh grated ginger and the candied ginger.  

Chill the dough for an hour or up to two days.  
When ready to bake, preheat the oven to 350 degrees and line a cookie sheet with parchment paper.  Using a small scoop, or a teaspoon, drop small balls onto cookie sheet....a couple inches apart.  These spread quite a bit.  Bake for 12-14 minutes.  Cool on pan for 10 minutes or so then transfer to a cooling rack. These cookies will get crispier as they cool. 

Enjoy!


Thursday, January 8, 2015

Blueberry Chia Overnight Oats

Overnight oats have probably been around for a while, but we've recently just discovered them. I know---crazy, right? While oats aren't something I want to eat every morning (because I like eggs and bacon way too much), I do love the convenience of these.
These are perfect for mornings that you know you'll be busy and don't have time to cook. For us, overnight oats are great for Sunday mornings. We have a healthy breakfast before church that isn't heavy! 
Overnight oats are also so versatile! The possibilities for flavors and combos are endless. The oats thicken nicely in the milk while you are sleeping soundly. They are also great because they can be adapted to fit the needs of your family if food allergies are present. Of course, it is also just fun to eat out of a jar!
Try different combos, get creative, and yes, play with your food. I give you permission. :)


Blueberry Chia Overnight Oats
1serving

1/2 cup oats (gfree if needed)
3/4 cup milk (any kind)
Splash of vanilla
1 Tbsp chia seeds
1 Tbsp brown sugar or honey
~1/3 cup blueberries
Optional-- plain Greek yogurt (just a little) or vanilla protein powder (1/2 scoop)

Mix all ingredients in a jar. Cover with lid and place in refrigerator overnight. Enjoy in the morning. This is meant to be eaten cold, but I still like to microwave it about 30 seconds before eating. I also add additional blueberries before indulging.


Wednesday, December 3, 2014

Coconut Layer Cake

Do you like coconut? I've learned that people are either a fan of it or they really just don't care for it much at all. I love it! My husband had a not-so-pretty episode with coconut as a child, so he's pretty much turned off by the tropical fruit.

And coconut is so popular now--- with coconut milk, coconut water, coconut cream, and let's not forget the powerful coconut oil! Man, I LOVE that stuff.

But let's talk about shredded coconut. You can buy it either sweetened or not. You can toast it and sprinkle it on ice cream..or garnish a cake with it. How about coconut shrimp? Yum!

But now it's time for cake!  As a child, I always requested an ice cream cake for my birthday. Those are just so fun and yummy and hey...it was like a two for one!  As I got older and my palate matured a bit, I began asking for my Mama's Coconut cake.  My birthday is in early April, so many years Easter falls on or around my birthday. Coconut cake is also a great dessert for Easter.
I made it this year for Thanksgiving. It is also perfect for Christmas. Bottom line---- coconut cake is wonderful all year long. But in moderation of course. I'm struggling with that.

You know what's even better? You can use a cake mix! Now of course for those of you that cringe at the thought of a boxed mix, a scratch cake would be awesome too. I've done it both ways. And I honestly do prefer the scratch cake myself. That's because it is better than a boxed gluten free cake mix. And really, the icing is what makes this cake. That's where all the coconut is.  This is also one of those cakes that gets better as the days go on.  Which is probably another reason a scratch gluten free cake worked better.


OK, ready? Here we go.

Coconut Layer Cake

Icing
1 pint sour cream (light is fine to use)
2 cups sugar (I know, I know..but I said light sour cream is OK)
3 packages frozen sweetened coconut. (See picture for what I use) 


I let the coconut thaw slightly, then...mix all the ingredients together and refrigerate for 24 hours. 

Cake time

Next make your cake. You can wait and bake your cake the next day when the icing is ready. Whatever floats your boat. 

So.... Bake a yellow cake in two round cake pans. Cake mix or scratch...whichever you prefer. Let the cake cool completely! Once cooled, slice each layer in half with a serrated knife so that you'll have four layers of cake. 


Grab a cake plate. Place one layer down and slap some of that delicious coconut icing on top. Spread and repeat with the remaining layers. Once you get to the last layer, pour the rest of the icing on top and spread it around. You do not need to ice the sides. Because this icing is a little runny, it will run down the sides, icing itself. Store the cake in the refrigerator. That's it! Sooo good!



Saturday, November 22, 2014

Slow Cooker Chicken Tortilla Soup


Here is a recipe I've been meaning to share with you.  Between homeschool, laundry, church, dishes, soap making, laundry, and feeding my family I somehow forgot to post this recipe. Did I mention laundry? 


I researched several soup recipes similar to this one. I wanted something that would suite the tastes of my family and be easy to prepare for those busy days. You know..one that I could turn on and walk away from..for hours. Because well, laundry.  So, I make this in the slow cooker.  It is perfect for those crazy busy days. If we are gone all day to co-op or running errands or whatever, it is so wonderful to have supper done when we arrive home.  This also makes a great Sunday lunch. Wouldn't it be nice to come home from church and sit down with a warm bowl of soup? 

This recipe is similar to The Pioneer Woman's recipe for Chicken Tortilla Soup.  I tweaked it to make it fit for us.  I did, however, use her way of making the fried tortilla strips.  Those are sooo good. So check out her post for the tortilla strips.  

We like corn, so I use quite a bit.  A quart size bag is what I use for this soup. We "put up" corn here every summer. I put probably two and a half cups (maybe even three) in one quart size bag.  It is so nice to have a freezer full of corn all year. If you are using canned corn, start with one can and then decide if you'd like more. I also only used two boneless skinless chicken breasts. Those chicken breasts went a long way!

*Note: If you don't feel comfortable putting raw chicken into the pot with the other ingredients, roast or boil your chicken a little bit first. I don't mind using it raw...and we lived to tell about it. ;-)

All the soup ingredients are just thrown into the pot.

Look at how wonderful the chicken shreds.

Slice the tortillas into strips.

Just before serving, fry the strips.


Slow Cooker Chicken Tortilla Soup

  • 2 large boneless, skinless chicken breasts
  • 1 quart of chicken broth (I use homemade. If you are using purchased broth, I recommend the low sodium)
  • 1 or 2 cans of corn (Or frozen--2 cups or more depending on your preference)
  • 1 can black beans, drained and rinsed
  • 1 can Rotel tomatoes and green chilies
  • 1/2 cup chopped onion
  • 1/3 cup chopped green pepper
  • 1/3 cup chopped red pepper
  • 1/2 teaspoon salt
  • 1/2 teaspoon pepper
  • 1/2 teaspoon garlic powder
  • 1 teaspoon chili powder
  • 1 teaspoon cumin
Fried Tortilla Strips

  • 3 or 4 small corn tortillas
  • oil for frying

Place all soup ingredients into slow cooker. Give it a stir.  Cook on low for 6-8 hours or until the chicken is done and shreds. 

Just before serving, slice the tortillas into strips and fry in hot oil. This does not take long. Keep your eyes on them. They will burn quickly! Again, see The Pioneer Woman's post for more instructions on the fried strips. 

Top individual servings with tortilla strips and whatever other toppings you like. We like sharp cheddar and a little avocado. 

Enjoy!


Friday, September 26, 2014

Butternut Squash Soup

You know by now that I don't love the cooler temps that come with fall, but I do love the fall foods. Soups, stews, breads, etc... are just warm and comforting. My aunt gave me a few butternut squash from her garden and I knew just what I was going to do with them. I love to roast them with sweet potatoes and red skin potatoes, but I really enjoy butternut squash Soup.


I found a recipe in a magazine a year or so ago for butternut squash soup and I sort of followed it. There were ingredients in the recipe that I don't normally use or have on hand. I decided to create my own similar recipe and I love how it turned out.   There are apples and a potato hiding inside and I topped it off with bacon  pieces. You can never go wrong with bacon!  I served the soup with gluten free cheese garlic bread and a simple salad of greens, cucumber, strawberries,  and fresh from the mountains apples and pears.

These are three small squash that yielded exactly 4 full cups diced. I used half of this potato.


 I love the smell of onions cooking. Sadly, this was my last Vidalia.

4 full cups of peeled and diced butternut squash.


All the veggies, fruit, and spices added to the pot.


After the soup cooks for about 30 minutes, it is time to puree.  I LOVE my immersion blender.


Ready for the full recipe? You will enjoy it!

Butternut Squash Soup

  • 2 Tbsp olive oil
  • 1 small onion, chopped
  • 4 cups butternut squash--peeled, seeded, and diced (I used 3 small squash, but you might find that one large one is sufficient.)
  • 2 medium apples-- a sweeter variety (I used an old fashioned Grimes Golden. Golden Delicious will work well, too.), peeled and diced
  • 1 medium russet potato--peeled and diced
  • 1 quart of chicken broth--homemade is best!
  • 1/2 cup apple juice
  • 1/2 tsp black pepper
  • 1 tsp seasoned salt
  • 1 tsp fresh rosemary, chopped
  • Rosemary sprigs and bacon crumbles for garnishing
In a large pot, heat olive oil and cook onion until tender.  Add in the squash, apples, potato, chicken broth, apple juice, pepper, salt, and chopped rosemary.  Bring to a boil, then reduce heat to medium and cook for about 30 minutes or until veggies are tender.  Remove from heat, and puree with an immersion blender until smooth and no lumps remain.  Serve warm and top with bacon crumbles and a sprig of fresh rosemary.  

*Note:  If you do not have an immersion blender, try an electric hand mixer.  This would blend wonderfully in a VitaMix.  Too bad I don't have one of those!

Perfect Fall meal!


Monday, September 22, 2014

Gluten Free Pumpkin Bread

Well, fall has arrived in southeastern Virginia.  That means all things pumpkin, sweet potato, apples, and hot apple cider.  I decided I would make some pumpkin bread last weekend after I had been challenged to participate in #BeTheGood.  Be the Good is all about random acts of kindness and showing love to others. We have new neighbors in the area so we decided to fix them up a gift basket of homemade goodies. For more information on this project, visit Cents of Style . 
The pumpkin bread turned out to be very delicious. My oldest daughter cannot get enough of it!  It is also very good toasted with pumpkin pie spice cream cheese spread on top.  Another plus is that it is easy to make and the house smells divine while it is baking.


Gluten Free Pumpkin Bread

  • 2 cups of white sugar
  • 1/2 cup brown sugar
  • 1/2 cup oil
  • 1/2 cup unsweetened applesauce
  • 4 eggs
  • 1 15oz can of pumpkin
  • 2/3 cup water
  • 3 1/2 cups gluten free flour 
  • 3 tsp xanthan gum
  • 2 tsp baking soda
  • 1 1/2 tsp salt
  • 1 tsp cinnamon
  • 1 tsp nutmeg
  • 1/2 tsp allspice 
  • dash of ground cloves
Preheat oven to 350 degrees.
Grease and flour 2 regular size loaf pans or about 6 mini loaf pans.

Mix sugars and oil together in a stand mixer.  Add applesauce and mix well. Add eggs.  Mix well. Then add the pumpkin and water.  While that combines thoroughly, mix dry ingredients in a separate bowl. 

Slowly add the dry ingredients into the wet ingredients in mixer.  Mix well.  Pour into the prepared pans 3/4 full.  Bake one hour or until golden brown and a tester inserted comes out clean. Let cool in pans for about 5 minutes then flip onto a cooling rack to cool completely. (If you can be that patient.)


Pumpkin Pie Spice Cream Cheese Spread

  • 4 oz Greek yogurt/cream cheese, softened (if you cannot find this, low fat cream cheese will work)
  • 1 1/2 tablespoons of agave nectar
  • 1/2 teaspoon pumpkin pie spice
With a hand mixer, mix the cream cheese until softened. Add the agave nectar and spice. Mix well.  Enjoy on toasted pumpkin bread. :)


Friday, August 22, 2014

Sweet Potato Biscuits {Gluten Free}

I know many of you are ready for fall to arrive. I, on the other hand, am not. Summer is never long enough for me.  I'd love for it to be summer all year long. But that's just not gonna happen, now is it? I do love the seasonal foods though and this recipe can be considered a fall food. But, really, you can buy sweet potatoes at the grocery store year round, so anytime of year is good to make these biscuits.

 Have you ever had sweet potato biscuits? Maybe it is a southern thing. I don't know, but they sure are good.  This is an old recipe that has been around for a while. I just adapted it to be gluten free. Gluten free Bisquick comes in handy for recipes like this, and the original "wheat" recipe is even made with regular Bisquick..or any other baking mix.

Start with two medium-large sized sweet potatoes boiled and peeled.

With a potato masher, mash up those sweet taters.

Add in the gluten free Bisquick, along with brown sugar and water.

This is what the mixture will look like once combined.  It will be moister than regular biscuits.

Roll out that dough onto a (gluten free) floured surface.  Using your grandma's old biscuit cutter helps make yummy biscuits. :-)

All cut out and ready for the oven.

Slap some ham in that biscuit.

Save some for the next morning. Toast the biscuits and add bacon. YUM!


Sweet Potato Biscuits {Gluten Free}

2 medium-large sweet potatoes (or 1 lb)
3/4-1 cup brown sugar
1/4 cup water
2 1/4 cups Gluten Free Bisquick (or any biscuit mix) (this will use almost an entire box of GF Bisquick)

Preheat oven to 350 degrees.

Boil or microwave the sweet potatoes. Let them cool, then peel them.  In a large bowl, mash the potatoes.  Add brown sugar, biscuit mix, and water. Start with 3/4 cup of brown sugar. Give it a little taste..add more if you prefer a sweeter biscuit.  Combine the mixture thoroughly.  It will be a lot moister than regular biscuit dough.  Flour table or counter top.  Roll biscuit dough out to 1/2" thickness.  Cut with a biscuit (cookie) cutter. Place on a greased cookie sheet or an ungreased baking stone.  These will not rise much because it is such a wet dough.  Bake in preheated oven for 15-20 minutes.  Keep an eye on them so they don't overcook.  I let them cook until the bottoms just begin to brown.

Enjoy with butter or even homemade jam. And don't forget the bacon. :)


Thursday, August 14, 2014

The Versatile Bagel (Gluten Free)

Who doesn't love a soft and chewy bagel?  Or a warm toasted one slathered with butter?  It is hard to resist, isn't it?  What if you just realized you couldn't have that anymore because of Celiac Disease or a gluten intolerance?  Hmmm.....that would make for a serious let down, huh? Well, that is where Udi's Gluten Free bagels come to the rescue!


Not only are Udi's gluten free bagels gluten free, they are also dairy, soy, and nut free as well. That is a blessing for so many people out there with food allergies.  And the best part is that Udi's offers a pretty tasty selection of bagels. There are plain, whole grain, cinnamon raisin, everything inside, and the mighty bagel.  With so many choices, it makes their bagels very versatile. 

The Everything Inside bagel is made with onion and garlic. This would be a great bagel toasted, buttered, or topped with cheese and served along side a big dish of spaghetti, gluten free of course.  The Mighty bagel is filled with dried cranberries, pumpkin seeds, quinoa, and other delicious ingredients. This is the ultimate breakfast bagel!

We love the whole grain bagels at our house.  Toasted in the morning (or even for an afternoon snack), slathered with Greek yogurt cream cheese and topped with homemade blueberry jam is a favorite.

Want something different for your cheeseburger?  Try a bagel!  While Udi's offers gluten free hamburger buns, I prefer to use a whole grain bagel.  It is just the right amount of bread for me.  Even for my burgers, I'll toast the bagel in a bit of butter so it is nice and crispy. YUM!  How is that for versatile?! 

Oh, and it doesn't hurt to "put an egg on it" ;-). 

So go out this week and grab some Udi's gluten free bagels and experiment for yourself. You won't be disappointed!


*I am not affiliated with Udi's gluten free. I just love their products.*